BY REGAN MIES
These 10 at-home science experiments are a great option to keep your toddler excited about learning during coronavirus. From the Lava Lamp Experiment to the Can Water Make Sound? Experiment, there’s a do-it-yourself activity for every eager learner. Chances are you have the materials for these experiments at home already!
If you’re looking for more science experiments, check out 15 Fun and Easy Science Experiments Kids Can Do at Home!
Science Experiments for Toddlers
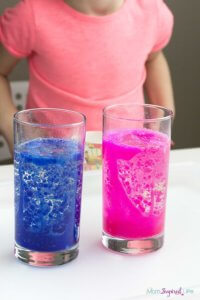
Lava Lamp Experiment
You’ll need: vegetable oil, water, food coloring, a clear cup and a few Alka Seltzer tablets
Instructions: Color 1/2 cup of water with food coloring. Fill another cup about ¾ full with vegetable oil. Then pour the colored water into the cup of vegetable oil until it reaches about 1 to 2 inches from the rim. Break the Alka Seltzer tablets into two or three pieces. Let your kids take turns adding pieces of Alka Seltzer to the cup.
Water and oil don’t mix. The oil won’t change color because the food coloring is water-soluble. The Alka Seltzer reacts with the water to make bubbles of carbon dioxide, which attach themselves to the colored water and rise to the top of the glass. When the bubbles pop, the colored water falls to the bottom of the glass.
Photo and Experiment via Fun Learning for Kids
Baking Soda Balloon Experiment
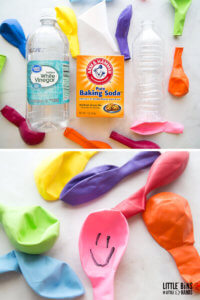
You’ll need: baking soda, vinegar, empty water bottles, balloons and an optional funnel
Instructions: Blow up the balloon just to stretch it out, then let it deflate. Feel free to draw smiley faces and fun pictures on the balloons before the experiment. Use your funnel to add one teaspoon of baking soda to the balloon. Fill your water bottle with vinegar until it’s half full. Attach the balloon to the water bottle, and make sure you have a good seal. Then lift up the balloon to dump the baking soda into the vinegar! Watch the balloon fill up, and swirl around the bottle to release the most gas.
Photo and Experiment via Little Bins for Little Hands
Ice Painting Experiment
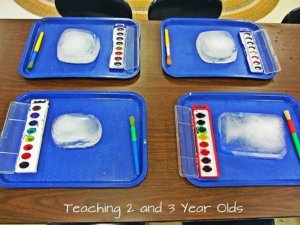
You’ll need: a large piece of ice that’s been frozen in your choice of plastic container, watercolors and a plastic tray to catch puddles
Instructions: Fill your plastic container with water, and allow it to freeze overnight. Before the activity, remove ice from the container, and place it onto a plastic tray. Let your kids use brushes and watercolors to paint on top of the ice block. Notice that the colors and textures start changing as the ice begins to melt! You can leave the artwork as is or place a piece of paper on top to make a print.
Photo and Experiment via Teaching Two and Three Year Olds
What’s Magnetic? Experiment
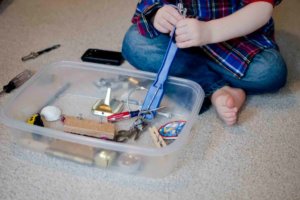
You’ll need: magnets, a bin or container, random items from your house and a curious kid
Instructions: Go around your house gathering small items in a plastic bin (kitchen utensils, keychains, desk supplies, toys and more). Choose some items that you know are magnetic and others that aren’t. Include some items that you’re not sure of! Invite your toddler to sort through the bin with a magnet to discover which items are magnetic and which aren’t. Try to find similarities and differences between them!
Photo and Experiment via Busy Toddler
Salt, Glue and Watercolor Absorption Experiment
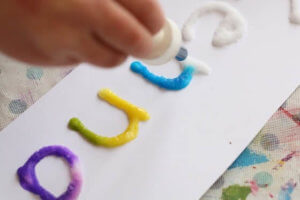
You’ll need: white glue, liquid watercolors (or food coloring and water), an ice cube tray, table salt, pipettes/droppers, cardstock and a tray or baking pan
Instructions: Write your child’s name on a piece of cardstock. Place the cardstock on the tray or pan. Let your toddler trace the letters with white glue, and allow them to cover their white glue with table salt. Have them shake the tray back and forth to make sure the glue is well-coated with salt. Fill an ice cube tray with water, and add different colors of food coloring into each “cube.” Present your toddler with a pipette so they can drip the food coloring/water mixtures onto their salt tracings. Watch what happens!
Photo and Experiment via Happy Hooligans
Salt, Glue and Watercolor Absorption Experiment
You’ll need: white glue, liquid watercolors (or food coloring and water), an ice cube tray, table salt, pipettes/droppers, cardstock and a tray or baking pan
Instructions: Write your child’s name on a piece of cardstock. Place the cardstock on the tray or pan. Let your toddler trace the letters with white glue, and allow them to cover their white glue with table salt. Have them shake the tray back and forth to make sure the glue is well-coated with salt. Fill an ice cube tray with water, and add different colors of food coloring into each “cube.” Present your toddler with a pipette so they can drip the food coloring/water mixtures onto their salt tracings. Watch what happens!
Photo and Experiment via Happy Hooligans

Build a Rain Shelter Engineering Experiment
You’ll need: building materials (foam blocks, cardboard, craft sticks, straws, tape and more), a small figure toy and a squirt bottle
Instructions: Lay out various building materials for your toddler. Ask them to help you make a house for their toy that won’t let in any rain. Discuss ways they could keep the toy dry from the water. Ask open-ended questions that allow your child to solve the problem on their own, like “What can hold a roof up?” or “What makes for a strong wall?” Once the shelter is complete, test it out by squirting water to simulate rain. Did the shelter keep the toy dry? If not, redesign and try again!
Photo and Experiment via Kids STEAM Lab
Walking Water Experiment
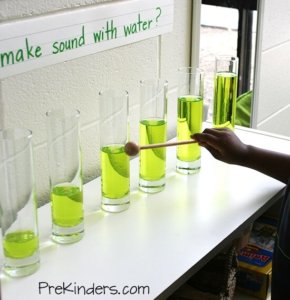
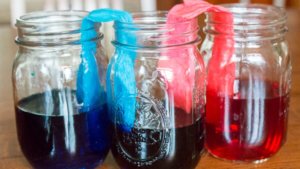
You’ll need: paper towels (the less absorbent the better), three clear jars/glasses, water and food coloring
Instructions: Have your child fill up two of the jars with water. Then add food coloring to make each jar a different color. Place the empty jar between the two with colored water. For best results, you can put each outside jar on top of books equal to each other in thickness. Help your child fold a paper towel in half multiple times until it’s a long, skinny strip that’s about an inch wide. Do it again with the other paper towel. Dip one end of one paper towel strip into a jar filled with colored water, and lay the other end of the strip into the empty jar. Repeat with the second paper towel strip and the other jar. The dry portions of the two paper towels should meet in the middle jar.
Tell your child that the water will “walk” up the paper towels. Think about absorption and wiping up spills with paper towels. Talk about liquid being soaked up by the towel, then about gravity pulling the liquid back down. Ask about how long they think it will take for the water to start “walking” and what color the water might be in the middle jar. It might take a few minutes for the water to mix in the middle jar! Watch patiently and ask your toddler to describe what they see.
Photo and Experiment via PBS Kids
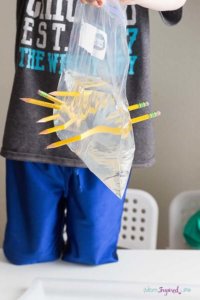
Leak-Proof Bag Experiment
You’ll need: a gallon-size storage bag, water and sharpened pencils
Instructions: Fill the plastic storage bag with water until it’s half full. Seal it shut. Help your toddler poke a pencil straight through the bag — in one side and out the other. Watch as it doesn’t leak! Keep poking more pencils through. The bag doesn’t leak because it’s made of a polymer, which is a long, flexible chain of molecules. When you poke through the bag, the molecules spread apart then seal themselves around the pencil.
Photo and Experiment via Fun Learning for Kids
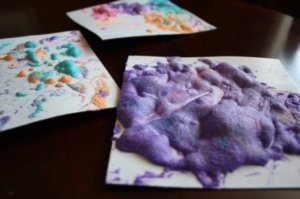
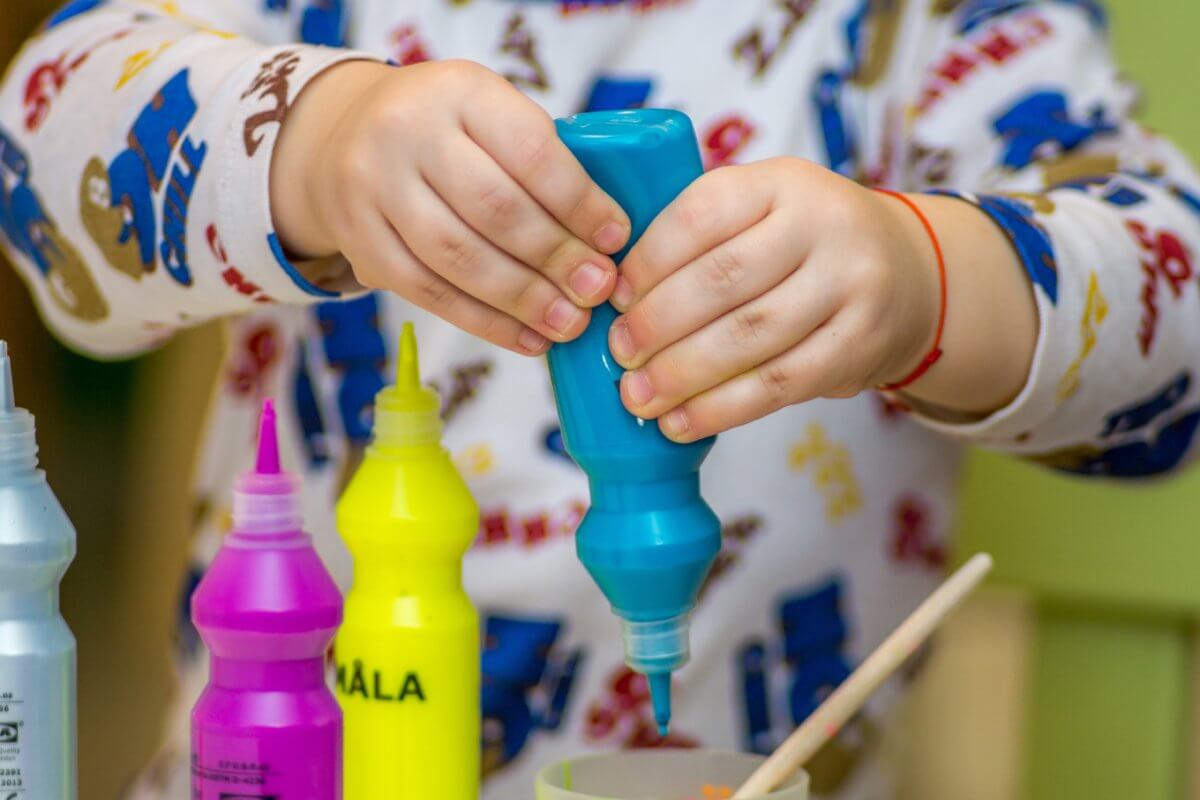
Three-Ingredient Puffy Paint Experiment
You’ll need: 1 cup all-purpose flour, 1 ½ teaspoons baking powder, ¼ teaspoon salt, water, food coloring, cardstock and paintbrushes/Q-Tips
Combine flour, baking powder and salt in a small bowl. Add a bit of water, and stir until you get a smooth, thin paste the consistency of stirred yogurt. Separate into different cups, and add food coloring for different colors. Mix well. Have your toddler use paint brushes or Q-Tips to paint masterpieces or doodles onto cardstock. Put the finished painting into the microwave for 30 seconds, and watch it puff up! Allow the painting to cool before handling.
Photo and Experiment via Happy Hooligans
This story originally appeared on newyorkfamily.com.